Necessary for mounting and dismantling tools

Tools for dismantle the mixer
- Wrench.
- Tow or FUM-tape.
- Duct tape.
- Screwdrivers (Phillips and flat various sizes).
- Carob keys.
- Wrench.
The dismantling of the old design
- You need to turn off the water in the riser.
- On the bottom of the tub to lay any unnecessary matter. This is done to ensure that the process does not damage the enamel accidentally fallen on a part or tool. Don't forget to cover the drain hole of the tub. There often leaving small details.
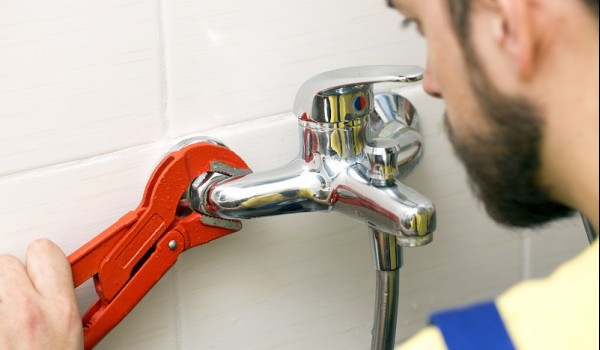
- By using gas wrench to loosen the faucet. If the plumbing replacement is not performed for more than ten years, you will have to exert much effort. Because during this time in the field of fasteners firmly settled lime and salt deposits. During the dismantling of the old mixer try to remove it carefully. Probably, some components will still come in handy.
- To neutralize the deposits, you can use the old-fashioned proven method. You need the seam to put 5-8 drops of brake fluid or kerosene. Leave all the manipulation on a quarter of an hour, and then to proceed to remove the old faucet.
- If the above method does not help, then apply special tool WD-40. People call it "liquid wrench". It instantly removes rust corrodes the paint and soften all the deposits that will give you the ability to easily remove old faucet.
- Use the basin to put in the mixer. It will definitely be water, which might spill on the floor.

Tool WD-40
Faucet installation: step by step instructions
- mounting on a vertical wall;
- mounting in the cleaner case;
- installation as a separate stand.
Mounting on the wall
Council. Position the faucet can be over the bathtub, sink or in between.
- After the dismantling of the old crane pay attention to eccentrics. For those unfamiliar with this concept, eccentric – the kind of adapters used in plumbing work. If they are in good condition, then replacement is not necessary.
- If replacing the eccentrics need be, take his gas key and loosen counterclockwise. Careless operation, it may break and then it will be necessary to disassemble the wall. Use fire lighters to heat the eccentric. So, the process will go faster.
- On the inner side of the pipe to remove the coating and deposits. Screw the FUM-tape to the new Cams.
- Turn the eccentric clockwise. They should be symmetrical.
- The faucet install gaskets.
- Eccentrics of the screw pads of the bowl.
- Wrap the nuts crane Cams. At first this can be done by hand, then wrench. Do not rush to action. Most importantly – don't collapse the thread.
- Attach the shower with a watering can.
- Smear the seals with soap so they don't have to cut.
- Turn on the water in the riser and use a new mixer with pleasure.
Installation in the housing of the bath
- Castellated milling cutter mounted on a drill to make a hole in the tub.
- The next stage – installation of the mixer.
- The valve pin by means of nuts. In order to attach the single-lever model, it is necessary to twist the pin and wear poluchayu. The nut tightened on the mixer and using the washer firmly fixed on the body of the bath.
- To sum flexible hoses with tap water to the mixer.
Faucets on separate rack
- The main problem will be mounting the piping to the floor. But if the repair is fully completed, it remains only one option – removal of pipes in the corner and cover with drywall.
- Next steps the installation is not much different from the installation of the faucets on the wall.
Replace the mixer with your hands: video
Installation of the mixer in bath: photo



 Everyone at least once in life faced with the need to replace the plumbing in the bathroom. The most common reason is failure of the mixer. The defective device can cause a significant blow to your wallet. Drop by drop from the tap one day follows a few liters of water, which at the end of the month will be a significant increase in rent. In addition, a broken faucet should not be used, but if you use it, be sure that it is long. There is an urgent need to replace the





Your opinion - will be useful to all!